


")
")


Total images in all categories: 11,045
Total number of hits on all images: 21,118,769
Total number of hits on all images: 21,118,769
Waiting for Glue to Dry


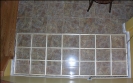
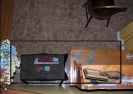

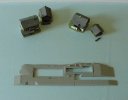
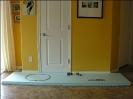

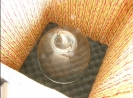
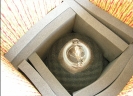
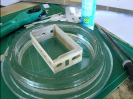
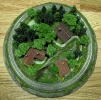

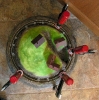
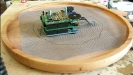
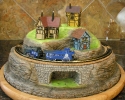
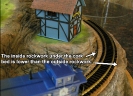
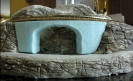
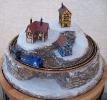
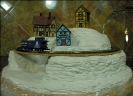
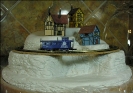

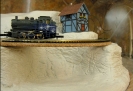
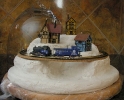
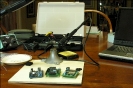
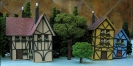
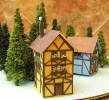
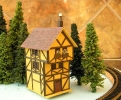

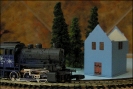
Image information
Description
Yesterday the houses and cork were glued in place. This morning, the track is getting the glue treatment.
To speed up the glue drying process of the track to the cork bed, I put the diorama in front of the heat register and cranked up the heat a notch.
Because the track is in such a tight radius, I used push pins to shape the track over the cork and clamps to hold the track to the cork while the glue dried. For awhile, I was using my fingers as clamps in the areas in the photo where there are no clamps. Then I got wise and brought out the hair drier and used it on low setting to help dry the glue a bit faster.
Shortly, I hope to weather the ties, then glue on the ballast using a dropper to carefully add glue to the cramped space around the track. Patience, I keep telling myself, but hurry up, too, so I can enter the photo contest!
Date
Monday, 23 March 2009
Hits
1899
Downloads
0
- Beverly,<br />Here's another option to securing track to cork. <br />I use thin CA. I use a fine nozzle and let it wick under the ties. I glue about a 1'2" long section and then spritz the just glued area with accelerator. The glue instantly sets and then I just do as Johnny Cash says...."I move it a little on down the line" When you ballast, everything is perfect.<br /><br />Disclaimer.......I have perfected this technique and it works great for me whether I glue down tight radius, (2 1'2") or broad sweeping turns. In the case of tight turns, I tend to use some medium body CA as it tends to hold tight radius track better until I glue down the rest of the track when gluing ballast with white glue/water mixture.<br /><br />My technique means you don't spend any time holding the track while the glue dries and you don't even need to use pins to hold track in place unless you are at the starting portion of your track gluing.<br /><br />Track laying master,<br />
 <br /><br />Loren0
 - Jim,<br /><br />The glue cured quickly with the extra heat, though I didn't have the hair drier on for very long. The ballast is on, but it took me three go arounds to get it (relatively) even. Sheesh! Those tight spots are killers - and they're all tight spots :o<br /><br />Jeremy,<br /><br />I didn't know those clamps had a name. Actually, they were the only clamps in Chris' collection that were the right size.<br /><br />Terry,<br /><br />I hope you're going to submit a photo of your bridge. Oh, no - do you have a caboose?!??0
- I can see you have been very busy. It looks great! We all want to see you enter it in the photo contest, so submit a picture even if it isn't finished.0
- Ah! Bessey clamps - you have good judgment in clamps! :-). Keep up the good work.<br /><br />Jeremy0
Filesize
159.78 KB (398 x 400 px)
Author
Beverly56
File size of the original image
642.33 KB (780 x 782 px)


You are not authorised to post comments.